We often think about being ready for an emergency, but delay preparing. Imagine a major disaster where daily comforts are gone. No food in stores or safe water from taps. In such times, emergency kits become essential for survival.
Today, I’ll share key tips on storing food and water for emergencies. I’ll show you how to keep your family fed and hydrated during disasters. Being prepared means thriving, knowing you can face anything.
Key Takeaways
- Understanding the critical components of emergency preparedness kits.
- Importance of having a well-thought-out plan for food and water storage.
- Why disaster survival gear is vital in an emergency situation.
- Balancing the need for practicality with the necessity of nutritional and hydration needs.
- Simple tips to start building or refining your emergency supplies today.
Understanding the Basics of Emergency Preparedness Kits
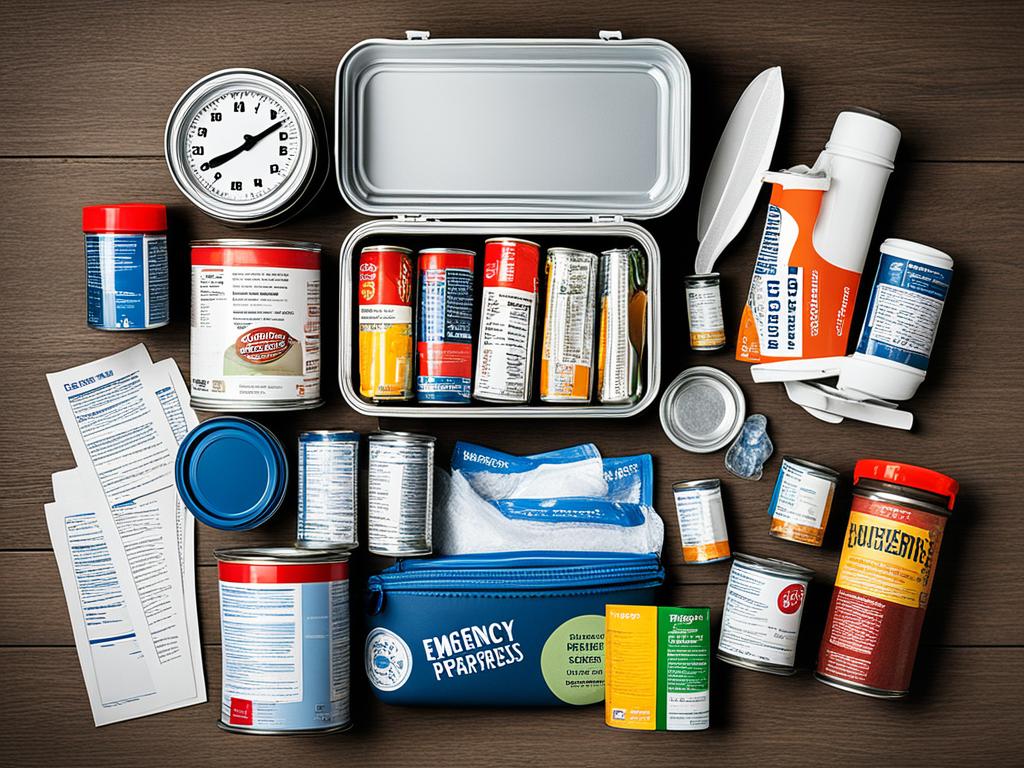
Having a ready emergency preparedness kit is key to disaster readiness. I’m here to help you create a kit filled with necessary items that will help you stay safe during emergencies. Keeping emergency food and water solutions ready is crucial. Adding water purification methods to our kits makes us even more prepared.
What to Include in Your Emergency Kit
Your emergency kit should cover basic needs. Most of it should be for storing food and water, vital for survival. Include non-perishable foods, enough water, and water purification options. Balancing lightweight foods and essential water is important.
| Item Category | Examples | Purpose |
|---|---|---|
| Food Supplies | Canned goods, freeze-dried meals, energy bars | Nutrition and Caloric Intake |
| Water Supplies | Bottled water, hydration packets | Hydration |
| Water Purification | Tablets, filters, boiling equipment | Ensuring water purity |
| Tools and Gear | Multi-tools, flashlights, batteries | Utility and Safety |
| First Aid | Bandages, antiseptics, medications | Medical Emergencies |
Strategies for Updating and Maintaining Your Kit
Keeping your emergency kit current is as vital as making it. Check your kit every six months to make sure food and water haven’t expired. Refresh your water purification supplies and test gear to ensure they work. Replace items with limited shelf life to keep your kit ready at all times.
- Inspect dates on emergency food and water storage solutions.
- Test emergency water purification tools and replace if necessary.
- Rotate supplies to keep your stock fresh and reliable.
- Update your kit with new advances in technology and gear.
Understanding the need for emergency food, water storage, and water purification is crucial. I hope this advice helps you stay safe and prepared.
Choosing the Right Emergency Food Supply Kits
When it’s about keeping my family ready for anything, picking the right emergency food supply kits matters a lot. I want to make sure we’re not just stocked up. I also want to ensure we’re set for the long haul. That’s because long-term food storage isn’t just about being prepared. It also gives us peace of mind.
Choosing the perfect kit means looking at several key things. We need to consider how long the food lasts, how well it meets our dietary needs, and how easy it is to make. It’s also important to think about any special diets or foods we prefer. The challenge is to find the right balance between how much food we have and how good it is.

I’ve put together a table to make things clearer. It compares the different features of emergency food supply kits. This guide is simple to use. It can help you figure out what matters most when picking long-term food storage options.
| Attribute | Importance | Details |
|---|---|---|
| Shelf-Life | Essential | Minimum of 5 years to maximize the longevity of your supplies. |
| Nutritional Content | High | Rich in calories, vitamins, and minerals to sustain energy levels. |
| Ease of Preparation | Significant | Preferably no-cook items or ones requiring minimal water and heat. |
| Variety | Significant | Assortment of meal options to prevent palate fatigue during extended use. |
| Special Dietary Needs | Customizable | Gluten-free, non-GMO, vegetarian options are available. |
After checking those key points, I think about if the kits can grow with our needs. It’s also important that they don’t take up too much room but are easy to get to.
Knowing I’ve made smart choices for emergency food supply kits brings me relief. It’s just as crucial as any safety step we take. This way, no matter what comes—a storm, a blackout, or another crisis—our long-term food storage is ready. It keeps us safe, fed, and ready for anything.
Long-Term Food Storage Solutions for Your Home
For long-term food storage, you need different kinds. This ensures your survival food supplies are good over time. You can choose from many options based on your space and money. Let me show you how to store your food correctly.
Freeze-dried meals are great for storing because they last long, are light, and easy to make. They don’t take up much room. You just need water to get a full meal. Canned goods are also a good choice. They’re cheap and can be kept for a long time. Grains and rice are nutritious and ideal for storing in large amounts.
Here’s a simple table that shows different long-term food storage choices. It looks at how long they last, how much space they need, and how easy they are to use.
| Food Type | Shelf Life | Space Requirement | Ease of Preparation |
|---|---|---|---|
| Freeze-dried Meals | Up to 25 years | Low – Compact packaging | Very high – Just add water |
| Canned Goods | 1-5 years | Medium – Heavy and bulky | High – Ready to eat or require minimal heating |
| Grains (Rice, Wheat) | Up to 10 years | High – Bulk quantities needed | Moderate – Requires cooking |
Keeping your food safe and fresh means storing it right. It should be in a cool, dry spot away from sunlight. Use containers that keep out bugs and moisture.
Mixing different kinds of long-term food storage gives you many options. It’s important to have enough food. But, don’t forget about the need for nutrition and variety. This keeps your family healthy and happy for a long time.
Organizing Your Emergency Water Storage Containers
Getting ready for unexpected disasters means having emergency water storage containers is key. The best containers keep your water safe and ready when you most need it. Let’s look at how to pick and set up these important parts of your disaster survival gear.
Selecting the Best Containers for Water Storage
Choosing the right containers is the first step in water storage. It’s important to think about durability, size, and what it’s made of. Opt for BPA-free plastic or glass bottles meant for keeping water safe long-term. Avoid any that have contained harmful chemicals before, as they can pollute your water.
- Stainless steel tanks: Perfect for storing a lot of water, they don’t rust.
- Stackable containers: They save room, making them easy to move and store.
- Collapsible bladders: Great for small spaces, they fold away when empty.
It’s also key to treat the water. You can add unscented bleach or use purification tablets. This helps keep your water safe to drink for longer.
Maximizing Space for Water Storage in Small Areas
If your living space is small, finding ways to hold emergency water can be tricky. Use furniture that serves more than one purpose and plan the layout well. This way, you can fit emergency water storage containers without them being in the way.
- Underneath beds: Tuck containers in unused spaces under furniture.
- Behind sofas: Hide water storage in spaces you don’t usually see.
- Custom shelving: Make shelves just right for your containers, so they look good.
Remember, using vertical space well is crucial in small areas. And, know where your disaster survival gear is, in case you need to leave quickly.

Adding emergency water storage containers to your home doesn’t have to clutter it or be a hassle. With careful planning and the right containers, you can keep your home comfy and be prepared for emergencies. This ensures your family’s safety and peace of mind.
The Significance of Emergency Water Purification
When disaster hits, quickly purifying water is key for survival. Getting safe drinking water through emergency purification stops dehydration. It also prevents diseases that could worsen the crisis.
Methods of Purifying Water During an Emergency
There are various ways to purify water in emergencies. Each way has its own pros and cons. Boiling water is easy and very effective. It kills harmful germs without chemicals.
Filtration systems, from simple handheld devices to more complex setups, can remove dirt and make water taste better. Chemical cleaners like chlorine or iodine are easy to carry. But, they need time to work and might change the water’s taste. Then, there’s the option of using UV light pens. They kill bacteria and viruses quickly, but they need batteries to work.
To be sure your water is clean, consider using more than one method. For example, filter out debris before using a UV light for more safety.
Storing Water Treatment Supplies
Knowing how to purify water is important. So is having a good place to keep your purification gear. Make a special spot in your emergency kit for these tools and materials.
- Keep treatment tablets in a dry, cool area.
- Place filters with your other emergency items. Remember to check them for maintenance.
- Always have extra batteries or a power source for devices like UV lights.
Good emergency water purification and smart storage are key to being ready for disasters. Without them, access to clean water, a basic need, is at risk in emergencies. Always remember, having clean water is as important as having enough water.
Emergency Food and Water Storage Solutions
Exploring preparedness has shown me that adding emergency food and water storage solutions to our homes is easy. You can find the right options regardless of living in a big house or small apartment. Choosing disaster survival gear that’s both effective and trustworthy is crucial. We can adopt strategies easily to ensure our safety in emergencies.
Preparing for the unexpected means having the right resources. Selecting the best emergency food and water storage is essential for true readiness.
Good preparedness begins with a solid plan. This plan should include plenty of non-perishable food and clean water. Plus, the gear needed to maintain these supplies over time is important too.
- Look at your space and resources to figure out the best storage method.
- Pick disaster survival gear that meets your household’s needs.
- Think about how to move your supplies quickly in an emergency.
Recognizing the chance to prepare starts the journey toward emergency preparedness. By adding emergency food and water storage solutions into our daily lives, we adopt a culture of readiness. This can protect us from the unexpected.
Having various storage solutions means resources can be a source of hope and safety when needed. It turns our homes into centers of survival, equipped with necessary disaster survival gear. This gear can be crucial in tough times.
To conclude, investing in emergency food and water storage solutions is vital for a complete disaster survival gear collection. I hope the tips here help you make choices that strengthen your storm resilience.
Maintaining Nutritional Balance in Your Survival Food Supplies
Nutrition is key, even in crisis times. The right survival food supplies keep you healthy in emergencies. It’s vital to have many nutritious options in your emergency preparedness kits. This way, you’ll meet your nutritional needs, even in hard times.
Assessing Nutritional Value in Emergency Food Options
I make sure my emergency food is nutritious. It’s not all about calories. Vitamins, minerals, protein, and fiber are important too. Foods should be balanced for a healthy diet, not just high in energy.
Incorporating Dietary Restrictions in Emergency Planning
Many have dietary restrictions due to health, allergies, or choice. It’s key to include these needs in emergency preparedness kits. Having gluten-free and dairy-free options ensures everyone’s health and beliefs are respected in a crisis.
I list all dietary needs for my family or group. Then, I customize the survival food supplies. This prevents health issues and brings comfort during tough times.
With the right selection and planning, your emergency kit will meet everyone’s dietary needs. Your emergency preparedness kits become a crucial support system. They’re not just food; they’re your well-being’s safeguard.
Shelf-Life and Rotation of Emergency Food Supplies
Understanding the shelf-life of long-term food storage is vital. Each item in your emergency food supply kits has a „best before“ date. However, with correct rotation, many items stay safe and edible after those dates. I’ll share how I keep my food fresh and nutritious. No one wants their emergency meal spoiled.
- I always keep an updated inventory list. It helps me track what I have and the expiry dates. This ensures effective rotation of my stock.
- I apply the „first in, first out“ (FIFO) strategy. This means older items are used before the newer ones. It helps prevent wasting food.
- For long-term food storage, I use airtight containers in cool, dry places. This practice prevents food from spoiling.
How often should you rotate your food? It depends on the food type, but checking every six months is a good rule. Here’s the table I refer to:
| Food Type | Shelf-Life | Rotation Frequency |
|---|---|---|
| Canned goods | 1-5 years | Every 6-12 months |
| Dry goods (rice, pasta) | Up to 2 years | Every 6 months |
| Freeze-dried meals | 10-30 years | Every 5 years |
| Water supplies | Indefinite | Every year (storage containers check) |
By following these rules, my emergency food supply kits stay safe and ready. This brings peace of mind. We know we’re prepared for emergencies. It’s a simple step that makes a big difference.
I hope my experience inspires you to check your long-term food storage plans. Remember to check expiry dates and rotate your stock regularly. This ensures your emergency supplies are always ready.
Conclusion
In this article, we took a journey to understand the value of self-sufficiency in emergencies. We discussed emergency food and water storage solutions thoroughly. This guide aimed to get your household ready for any crisis. We covered various strategies and key items for emergency preparedness kits. I hope you now see that planning well can bring you peace of mind.
Starting or improving your emergency kit is a step toward safety for you and those you care about. An effective emergency preparedness kit with good emergency food and water storage solutions is crucial. It’s not just for convenience; it’s a vital part of your disaster plan. Investing effort and resources now can make a huge difference in a crisis.
Take action and look over your current emergency strategies. Always look for ways to make your family’s emergency plan better. Staying adaptable and improving little by little is the key to being ready. By being informed and proactive, you ensure your family’s well-being in tough times. The time to prepare is now. A well-stocked emergency kit is your first defense against the unexpected.